Difference between revisions of "Virtual Robot Quickstart"
(→Robot Models) |
(→Read then dismiss the What's New window) |
||
| (23 intermediate revisions by the same user not shown) | |||
| Line 37: | Line 37: | ||
Press CTRL + F5 on your keyboard to clear your browser's cache and reload the page. This ensures everything updates. | Press CTRL + F5 on your keyboard to clear your browser's cache and reload the page. This ensures everything updates. | ||
| − | Click on the X in the top right corner | + | Click on the X in the top right corner of the What's New window to dismiss it. |
==Select your robot model== | ==Select your robot model== | ||
| Line 65: | Line 65: | ||
<li style="display: inline-block;">[[File:main_robothespian_gripping_hands_projected_face.png|thumb|none|200px|link=RoboThespian|5. RoboThespian 4, Gripping Hands & InyaFace]]</li> | <li style="display: inline-block;">[[File:main_robothespian_gripping_hands_projected_face.png|thumb|none|200px|link=RoboThespian|5. RoboThespian 4, Gripping Hands & InyaFace]]</li> | ||
<li style="display: inline-block;">[[File:main_robothespian_projected_face.jpg|thumb|none|200px|link=RoboThespian|6. RoboThespian 4, InYaFace<br><br>]]</li> | <li style="display: inline-block;">[[File:main_robothespian_projected_face.jpg|thumb|none|200px|link=RoboThespian|6. RoboThespian 4, InYaFace<br><br>]]</li> | ||
| − | <li style="display: inline-block;">[[File:main_socibot.jpg|thumb|none|200px|link=SociBot|7. Socibot | + | <li style="display: inline-block;">[[File:main_socibot.jpg|thumb|none|200px|link=SociBot|7. Socibot Mini<br><br>]]</li> |
<li style="display: inline-block;">[[File:main_socibot_kiosk.jpg|thumb|none|200px|link=SociBot|8. Socibot Kiosk<br><br>]]</li> | <li style="display: inline-block;">[[File:main_socibot_kiosk.jpg|thumb|none|200px|link=SociBot|8. Socibot Kiosk<br><br>]]</li> | ||
</ul></div> | </ul></div> | ||
| Line 71: | Line 71: | ||
You can identify your Model from the [[Serial_Number_Identification| Serial Number Plate]] or if you are still unsure please [mailto:info@engineeredarts.co.uk contact Engineered Arts] | You can identify your Model from the [[Serial_Number_Identification| Serial Number Plate]] or if you are still unsure please [mailto:info@engineeredarts.co.uk contact Engineered Arts] | ||
| − | ===Example: SociBot | + | ===Example: SociBot Mini=== |
| − | + | * Click on Robots to open list of robot models (1). | |
| + | * If you have it, click on SociBot Mini in the drop down list (2). | ||
<div><ul> | <div><ul> | ||
| Line 78: | Line 79: | ||
</ul></div> | </ul></div> | ||
| − | + | It should take a few seconds to switch to Socibot Mini. | |
| − | + | Once loaded you'll see: | |
| − | + | * The SociBot Mini model (4). | |
| − | + | * SociBot MIni specific Animation Tools (5). | |
| − | + | * SociBot Mini specific inputs (6). | |
| − | |||
<div><ul> | <div><ul> | ||
| Line 107: | Line 107: | ||
===Example: Model RoboThespian4=== | ===Example: Model RoboThespian4=== | ||
| − | If you have a RoboThespian 4, | + | If you have a RoboThespian 4, you can follow along with the instructions below to load it up in Virtual Robot along with |
| + | all its capabilities: | ||
| − | + | * Click on Robots to open the drop down list of robot models (1). | |
| + | * Click on RoboThespian4 in the list if you have that option available (2). | ||
<div><ul> | <div><ul> | ||
| Line 115: | Line 117: | ||
</ul></div> | </ul></div> | ||
| − | + | It'll now switch to RoboThespian4. | |
| − | |||
| − | |||
| − | |||
| − | |||
| − | Once loaded | + | Once loaded you'll see: |
| + | * The RoboThespian4 model (4). | ||
| + | * RoboThespian4 specific Animation Tools (5). | ||
| + | * RoboThespian4 specific inputs (6). | ||
<div><ul> | <div><ul> | ||
| Line 140: | Line 141: | ||
===Lipsync=== | ===Lipsync=== | ||
| − | '''RoboThespian will automatically lipsync to any audio files''' you add. '''Socibot and Mesmer require animated lipsync''', but Virtual Robot can generate this for you. Lipsync is generated automatically when adding Text to Speech items, but you can generate lipsync with any sound file selected by clicking '''Edit -> Generate -> Lipsync'''. | + | '''RoboThespian will automatically lipsync to any audio files''' you add. '''Socibot and Mesmer require animated lipsync''', but Virtual Robot can generate this for you. Lipsync is generated automatically when adding Text to Speech items, but you can generate lipsync with any sound file selected by accessing the menu bar and clicking '''Edit -> Generate -> Lipsync'''. |
With Text to Speech Socibot will automatically lipsync with mouth shapes! Sometimes it can be useful to create Text to Speech and use it's generated lipsync along-side your own audio files (just remember to delete the extra speech). | With Text to Speech Socibot will automatically lipsync with mouth shapes! Sometimes it can be useful to create Text to Speech and use it's generated lipsync along-side your own audio files (just remember to delete the extra speech). | ||
| Line 168: | Line 169: | ||
</ul></div> | </ul></div> | ||
| − | Each | + | Each sentence gets added as a separate block for easy editing: |
<div><ul> | <div><ul> | ||
| Line 198: | Line 199: | ||
# Adjust colour with colour picker {{num|8}} | # Adjust colour with colour picker {{num|8}} | ||
# If desired select another body part and adjust colour, repeat steps 3. and 4. | # If desired select another body part and adjust colour, repeat steps 3. and 4. | ||
| − | # Click {{num|9}} to add the colour to the timeline where the timeline marker {{num|1}} is | + | # Click {{num|9}} or press "i" to add a keyframe with the colour to the timeline where the timeline marker {{num|1}} is. |
# Repeat from step 1. at next time wish to set a different colour | # Repeat from step 1. at next time wish to set a different colour | ||
| Line 205: | Line 206: | ||
<div><ul> | <div><ul> | ||
| − | <li style="display: inline-block;">[[File: | + | <li style="display: inline-block;">[[File:vr_eyes_tutorial.png|thumb|none|800px|link=|The Staging Area]]</li> |
</ul></div> | </ul></div> | ||
| − | + | * '''Mirror Eyes Button''' - Toggle this on/off to control eyes individually or with mirroring function (1). | |
| − | + | * '''Eye Graphics Drop Down Menu''' - Select animatable or static eye graphics from the list (2). | |
| + | * '''Animation Toolbox''' - When adding a keyframe for the eyes, make sure the eyes are selected in the animation toolbox (3). | ||
==Save your performance== | ==Save your performance== | ||
| Line 219: | Line 221: | ||
==Open a saved performance== | ==Open a saved performance== | ||
Click on "File" from the [[Virtual_Robot_Interface_%26_Environment#Menu_Bar| menu bar]], then: | Click on "File" from the [[Virtual_Robot_Interface_%26_Environment#Menu_Bar| menu bar]], then: | ||
| − | * | + | * Open File... open a previous performance (keyboard shortcut CTRL + O) |
==Transfer a performance to your robot== | ==Transfer a performance to your robot== | ||
Latest revision as of 12:36, 16 July 2018
Virtual Robot > Quickstart
Contents
- 1 Introduction
- 2 Log in
- 3 Read then dismiss the What's New window
- 4 Select your robot model
- 5 Start a new performance (animation)
- 6 Add audio
- 7 Add movements
- 8 Add "lights" (cheek and body colours) - RoboThespians with optional body RGB LEDs
- 9 Change eye graphics
- 10 Save your performance
- 11 Open a saved performance
- 12 Transfer a performance to your robot
- 13 Next steps
Introduction
Virtual Robot provides a simple to use web based tool for content creation on EA robots like RoboThespian and Socibot.
This page is a jargon free quickstart guide to creating and transferring an animation to your robot, aimed at new users.
For best results use a 1440 x 900 or higher resolution screen. 1920 x 1080, or 1920 x 1200 preferred.
Log in
All EA robots are shipped with a basic Virtual Robot account enabled you can access it at http://virtual.robothespian.co.uk, login required.
You may want to open Virtual Robot in another window while you read these pages.
If you don't know your Virtual Robot login details contact Engineered Arts Ltd
Please use Chrome or Chromium browser. If you really want to know why, you can read about it on this page - Remote_Connection
You will be greeted by this page:
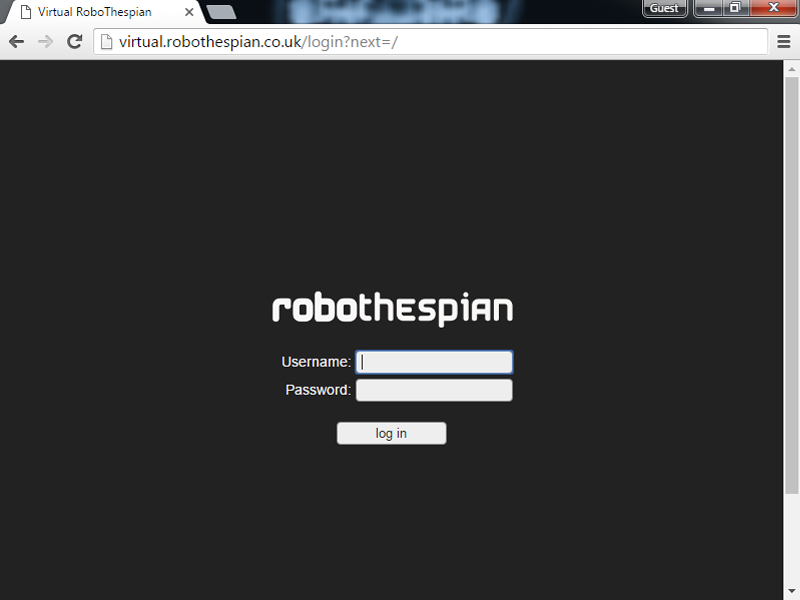
Type in your username and password and click "log in" to continue.
Read then dismiss the What's New window
The first time you login you will see the following screen:
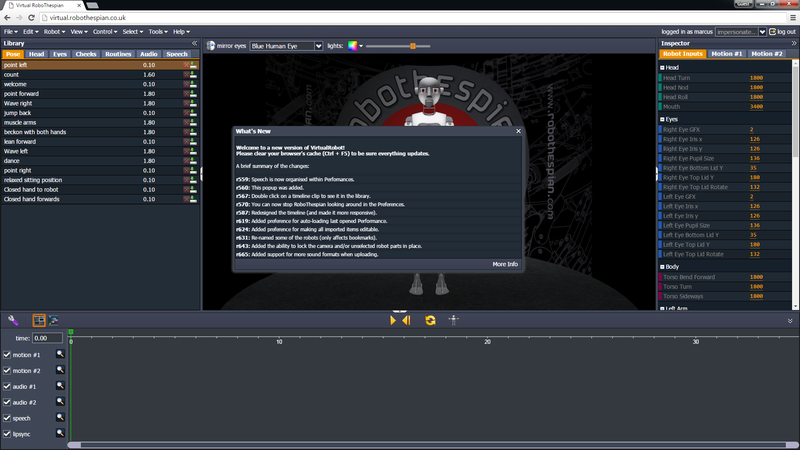
The What's new panel lists new features and shows up the first time you login and whenever there are any changes to Virtual Robot.
Press CTRL + F5 on your keyboard to clear your browser's cache and reload the page. This ensures everything updates.
Click on the X in the top right corner of the What's New window to dismiss it.
Select your robot model
Virtual Robot supports all the Robots EA make, and can also work with third party robots. Please ask
Make sure to select your robot model before doing anything else:
- Click on the Robots button from the top menu bar
- Select your robot model from the list

Robot Models
- Industrial Robot - an example Industrial Robot, used to demonstrate that 3rd party robots can be added to Virtual Robot on request.
- RoboThespian 3 - RoboThespians running IOServe software, shipped before September 2015
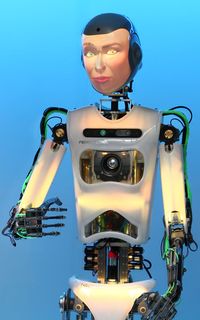
- RoboThespian 4 - looks identical to RoboThespian 3, but runs newer Tritium software, shipped from September 2015 onwards.
- RoboThespian 4, Gripping Hands - as RoboThespian 4, but with adaptive gripping hands
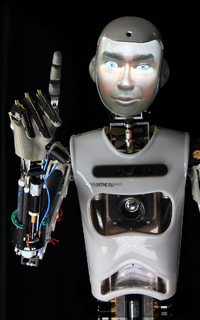
- RoboThespian 4, Gripping Hands & InYaFace - as RoboThespian 4, but with adaptive gripping hands and projected face
- RoboThespian 4, InYaFace - as RoboThespian 4, but with projected face
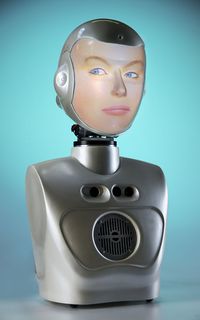
- SociBot Desktop - compact SociBot with a truncated torso
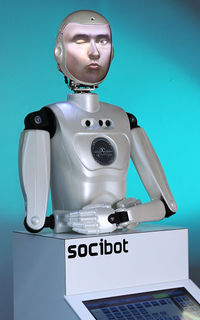
- SociBot Kiosk - integrated touchscreen, has (non-functional) arms to enhance its human-like appearance


You can identify your Model from the Serial Number Plate or if you are still unsure please contact Engineered Arts
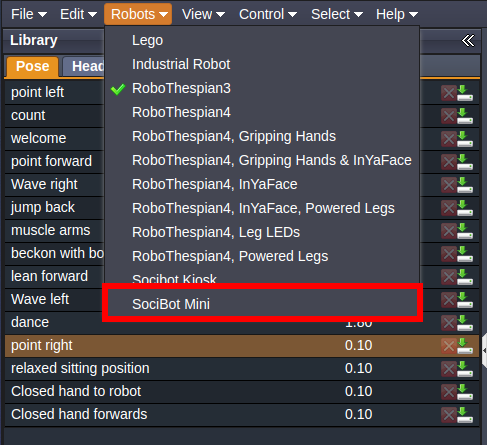
Example: SociBot Mini
- Click on Robots to open list of robot models (1).
- If you have it, click on SociBot Mini in the drop down list (2).
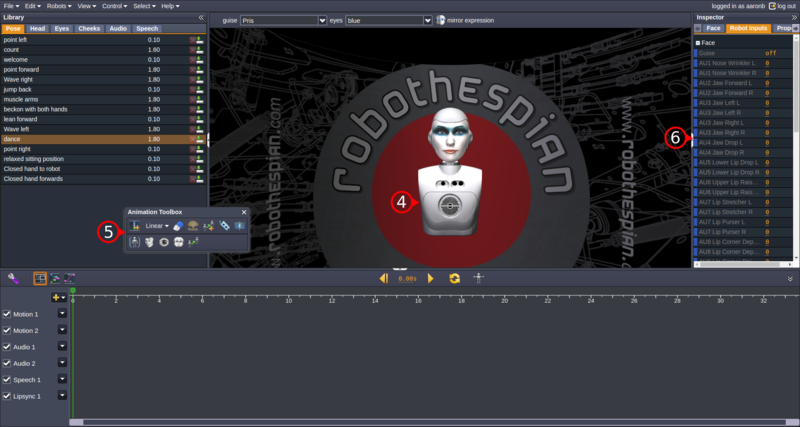
It should take a few seconds to switch to Socibot Mini.
Once loaded you'll see:
- The SociBot Mini model (4).
- SociBot MIni specific Animation Tools (5).
- SociBot Mini specific inputs (6).
Looks a bit small? Zoom in!
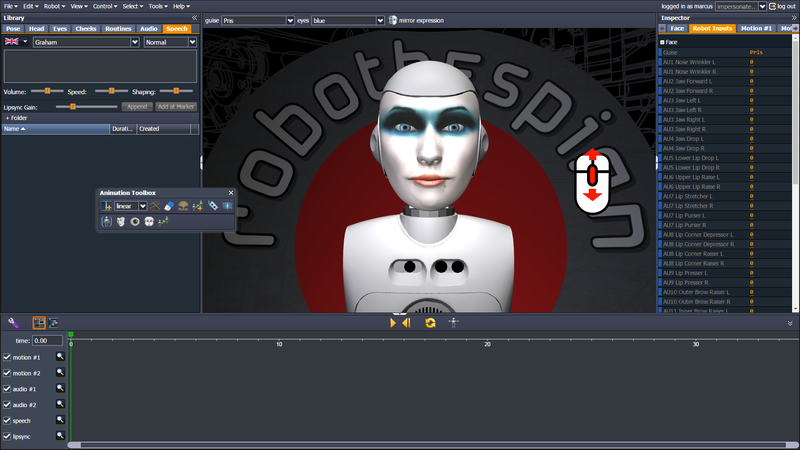
Use the mouse wheel to zoom in or out of the model:
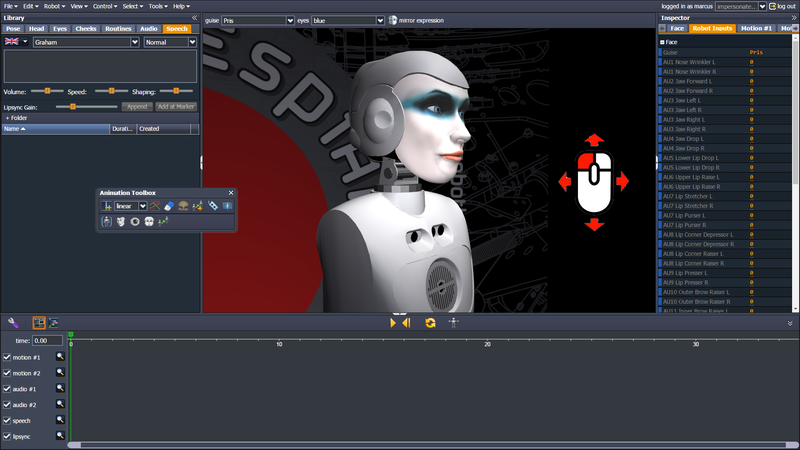
Need a different angle to see what you are doing? Move the camera!
Double click on the part of the robot you want to look at.
Then hold the left mouse button down and move your mouse to move the camera around.
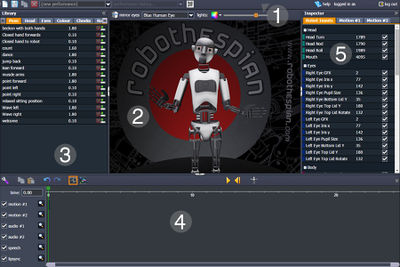
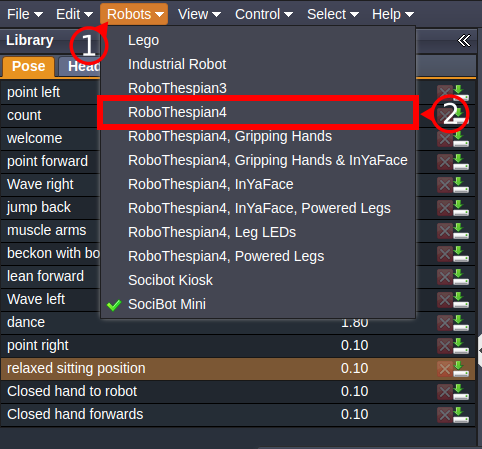
Example: Model RoboThespian4
If you have a RoboThespian 4, you can follow along with the instructions below to load it up in Virtual Robot along with all its capabilities:
- Click on Robots to open the drop down list of robot models (1).
- Click on RoboThespian4 in the list if you have that option available (2).
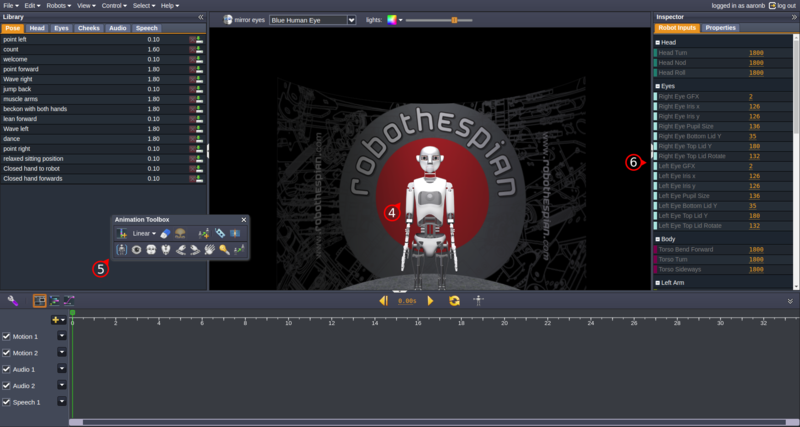
It'll now switch to RoboThespian4.
Once loaded you'll see:
- The RoboThespian4 model (4).
- RoboThespian4 specific Animation Tools (5).
- RoboThespian4 specific inputs (6).
Start a new performance (animation)
Note that the terms animation, performance and sequence are used interchangeably. Sequence = animation = performance.
Add audio
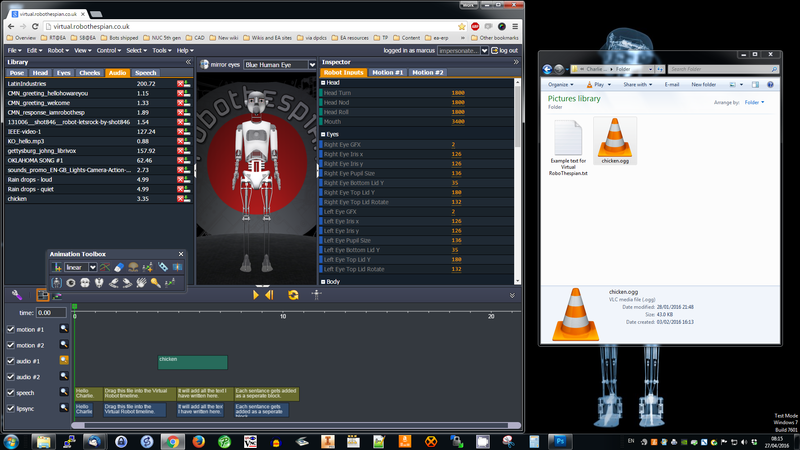
Add an audio file
If you have already got some pre-recorded audio files you can drag & drop them onto the timeline to upload them. Most audio formats can be used (mp3, wav, ogg, flac, etc). If the file you're trying to upload is too big, you may be able to make it small enough by converting it to another format (e.g. transcoding a wav file to a compressed flac).
Lipsync
RoboThespian will automatically lipsync to any audio files you add. Socibot and Mesmer require animated lipsync, but Virtual Robot can generate this for you. Lipsync is generated automatically when adding Text to Speech items, but you can generate lipsync with any sound file selected by accessing the menu bar and clicking Edit -> Generate -> Lipsync.
With Text to Speech Socibot will automatically lipsync with mouth shapes! Sometimes it can be useful to create Text to Speech and use it's generated lipsync along-side your own audio files (just remember to delete the extra speech).
Add text to speech
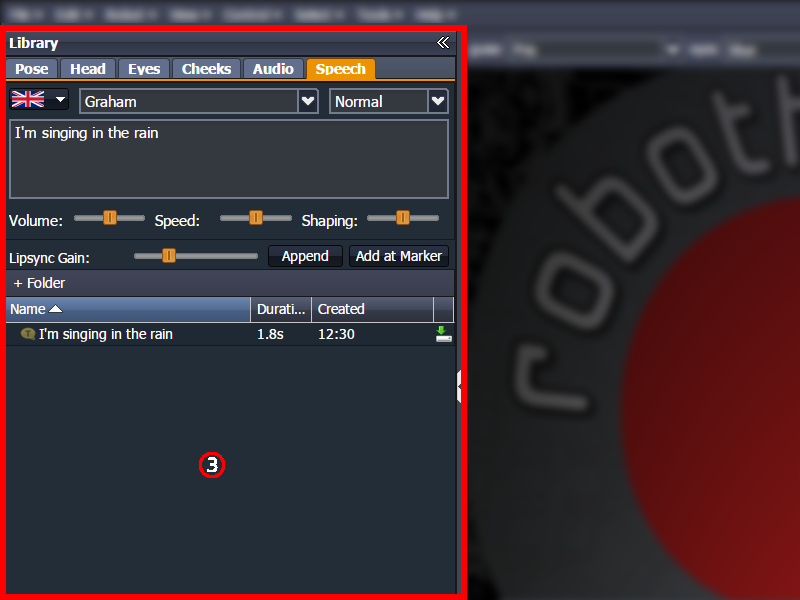
In the pane marked Library on the left, click on the Speech tab.
The 'Speech' section contains any text-to-speech content used (or available) to the current Project.
Create new text-to-speech clips, by typing in the large box.
Add this speech to the end of your timeline by pressing the 'Append' button.
You can also add the speech at the location of the Timeline marker using the 'Add at Marker' button.
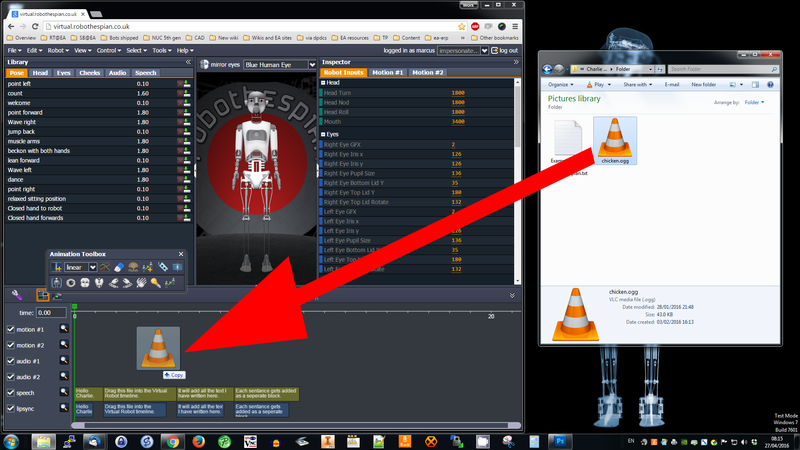
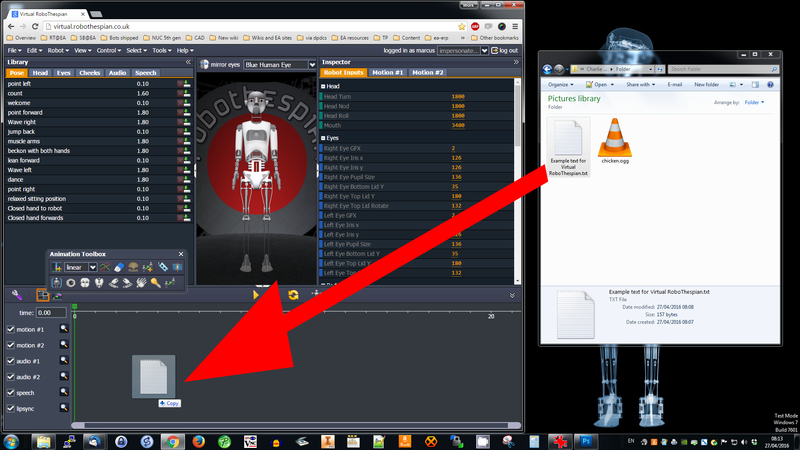
Got lots of speech to add? - add it from a text file
Write the speech you want in a plain text file (.txt) - do not use Microsoft Office filetypes (they contain hidden characters that do not adhere to standards and will not work)
Drag the text file from a folder on your PC onto the timeline.
Each sentence gets added as a separate block for easy editing:
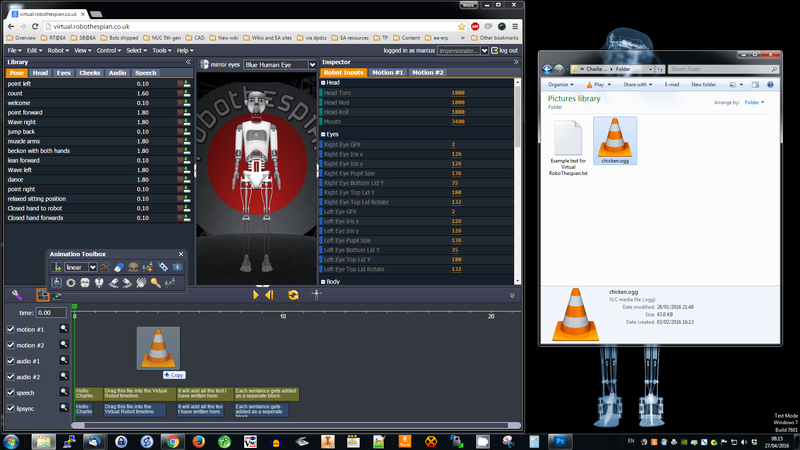
Example text used above:
Hello Charlie. Drag this file into the Virtual Robot timeline. It will add all the text I have written here. Each sentance gets added as a seperate block.
Add movements
The basic way
At least read this page for a quick guide to animating in Virtual Robot - Virtual Robot - Basic Guide to the Animation Pipeline
The advanced way
When you've got the hang of the basics, get into more depth here - Virtual Robot - Advanced Guide to the Animation Pipeline
Add "lights" (cheek and body colours) - RoboThespians with optional body RGB LEDs

- Move timeline marker to desired time
- Make sure lights selector is toggled on
- Select body part by clicking one of:
- right arm
- cheeks
- torso
- left arm
- pelvis - (Selected part flashes blue briefly to indicate it has been selected)
- Adjust colour with colour picker
- If desired select another body part and adjust colour, repeat steps 3. and 4.
- Click or press "i" to add a keyframe with the colour to the timeline where the timeline marker is.
- Repeat from step 1. at next time wish to set a different colour
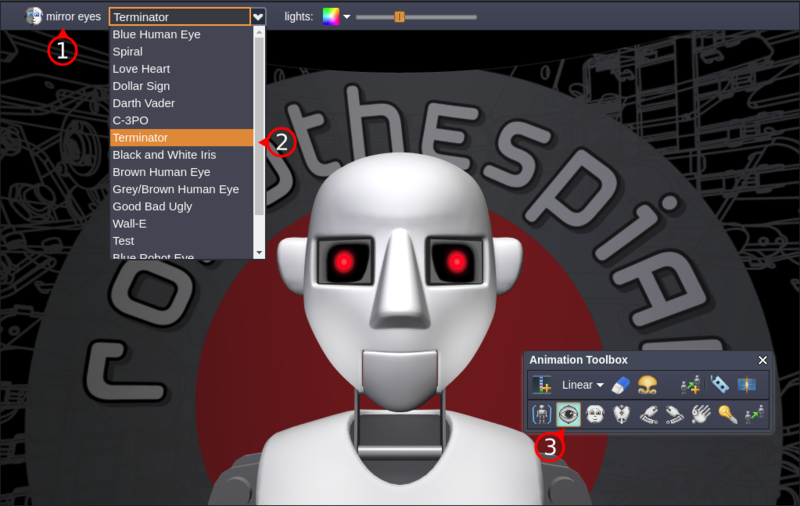
Change eye graphics
Select desired eyes from the drop down menu and add a keyframe
- Mirror Eyes Button - Toggle this on/off to control eyes individually or with mirroring function (1).
- Eye Graphics Drop Down Menu - Select animatable or static eye graphics from the list (2).
- Animation Toolbox - When adding a keyframe for the eyes, make sure the eyes are selected in the animation toolbox (3).
Save your performance
Click on "File" from the menu bar, then:
- Save File - save the current performance (keyboard shortcut CTRL + S) or
- Save As... - save current performance with a different name (i.e. rename) or
- Save Copy As - Save a copy of the current performance
Open a saved performance
Click on "File" from the menu bar, then:
- Open File... open a previous performance (keyboard shortcut CTRL + O)
Transfer a performance to your robot
Virtual Robot Content Organizer is used to arrange touch screen and Telepresence content, add button images and text labels; transfer new performances and synchronise updates to performances with your robot, even while the robot is switched off.
Next steps
Get a deeper understanding of the interface and the terminology used in the Virtual Robot Interface & Environment and Virtual Robot - Animation Terms & Definitions
Then explore the links at the bottom of that page to create more complex animations, animate multiple robots in sync and learn about Virtual Robot in more depth.