Difference between revisions of "RoboThespian Quickstart"
| Line 2: | Line 2: | ||
[[Category: Set up]] | [[Category: Set up]] | ||
[[Category:User_Manual]] | [[Category:User_Manual]] | ||
| − | [[Category: RoboThespian]] | + | [[Category: RoboThespian]]__NOTOC__ |
=Quick Start Guide= | =Quick Start Guide= | ||
[{{fullurl:{{PAGENAME}}|action=pdfbook&format=single}} Download this page as printable .pdf] | [{{fullurl:{{PAGENAME}}|action=pdfbook&format=single}} Download this page as printable .pdf] | ||
Revision as of 16:24, 15 March 2016
This is a protected page.
Quick Start Guide
Download this page as printable .pdf
Introduction
This is a very brief guide to rapid out of the box installation and operation of RoboThespian.
Minimum Installation Requirements
RoboThespian Installation Overview & Requirements
Do's and Don'ts
![]() Do follow the instructions in this wiki
Do follow the instructions in this wiki
![]() Do maintain your RoboThespian to ensure it operates safely
Do maintain your RoboThespian to ensure it operates safely
![]() Do switch off your RoboThespian if it is damaged or malfunctioning
Do switch off your RoboThespian if it is damaged or malfunctioning
![]() Do treat your RoboThespian with care and respect
Do treat your RoboThespian with care and respect
![]() Don't allow visitors to touch RoboThespian
Don't allow visitors to touch RoboThespian
![]() Don't disconnect any air or electrical connections while RoboThespian is switched on or has the compressed air supply connected
Don't disconnect any air or electrical connections while RoboThespian is switched on or has the compressed air supply connected
![]() Don't use solvent cleaners or abrasive pads on RoboThespian
Don't use solvent cleaners or abrasive pads on RoboThespian
![]() Don't make modifications or alterations to any settings without consulting the manufacturer first
Don't make modifications or alterations to any settings without consulting the manufacturer first
![]() Don't remove any covers to electrical components unless instructed to do so
Don't remove any covers to electrical components unless instructed to do so
![]() Don't hotplug any cables. Shut down robot and disconnect mains power before plugging / unplugging any cable
Don't hotplug any cables. Shut down robot and disconnect mains power before plugging / unplugging any cable
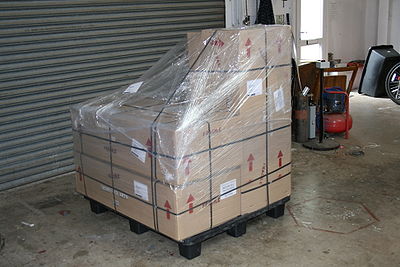
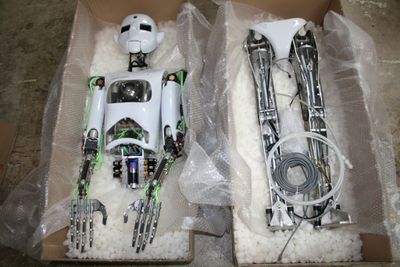
1) Remove boxes or (optional) flight case from pallet
- Open all boxes to identify contents, but do not unpack them yet.
- Please read all the instructions before starting.
- Note the arrows on the boxes, indicating which way up they should be for storage, and opening.
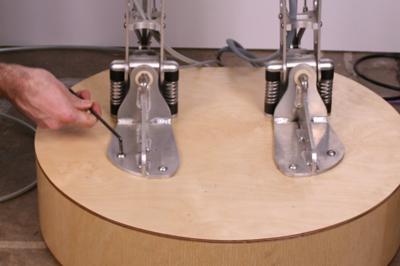
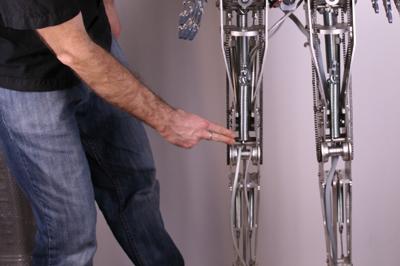
2) Assemble legs onto base
- Remove the wooden base and place in position.
- Remove the legs from their crate / box. Carry the legs in a vertical position, gripping them on the sides, near the top of the upper legs.
- Do not carry the legs using the hips as handles - there is a risk of pinching your fingers
- Screw the legs to the base using the supplied M8 button head screws. One person should support the top of the legs to prevent falling.
- Tools and fixture are cable tied to the top of the legs
- Make sure the legs are locked at the knees - push the knee back until the knee locks into position.
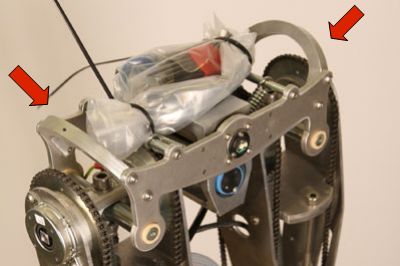
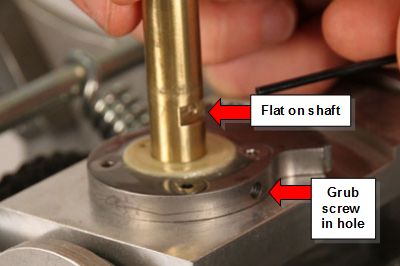
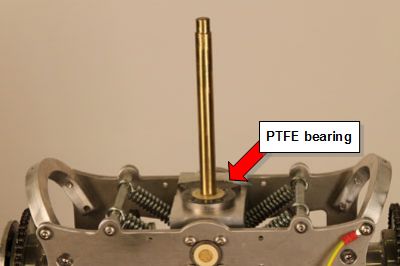
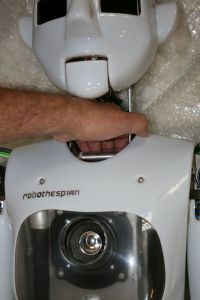
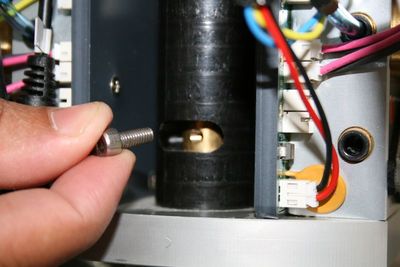
3) Fit the torso shaft
- Viewing the robot from behind. Note i) the threaded hole, containing grub screw and ii) the flat in the shaft used to locate the shaft and ensure the shaft rotational orientation is correct.
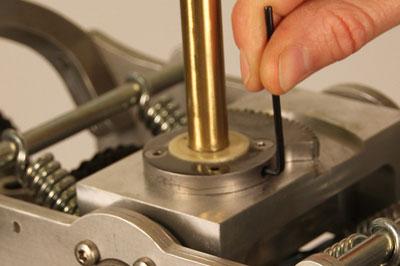
- Drop the shaft down until the flat is in line with the grub screw.
- Begin to tighten the grub screw, continuously rotating the shaft a few degrees in each direction as you tighten the grub screw - this will help locate the flat better.

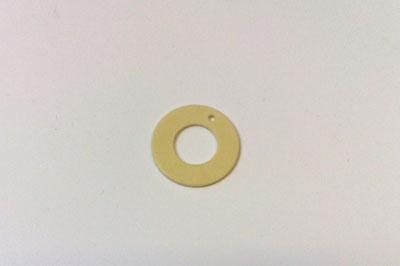
4) Position the yellow PTFE bearing
- Ensure the yellow PTFE bearing is in place at the base of the shaft
5) Feed cables through hole in base
- Gripping at the hips, lean the robot forward and feed the cables through the hole in the base:
6) Before proceeding, make sure that:
- The base and legs are prepared as described in the previous section
- A second person is available to help with the next steps
- There is sufficient space behind the robot so that a second person can stand behind and help locate the torso onto the brass shaft
- You have read the following steps
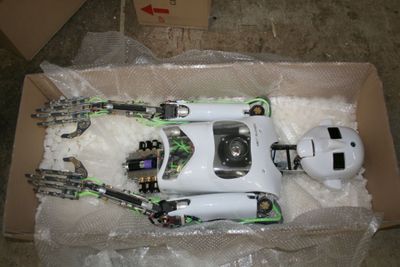
7) Assembling torso onto legs
- Unpack torso, clearing away any packing chips on the torso
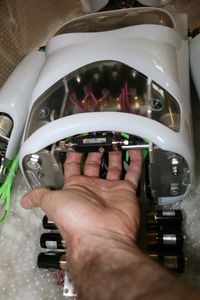
- Lift the torso by the aluminium bars at the neck and abdomen and carefully lift clear of the box.
- While gripping the aluminium bar at the neck, take care not to put pressure on the plugs behind the bar.
- If required, a second person can assist by gripping the metal of the upper arms.

Take care to lower the torso straight down – a second person at the robot's back should guide the torso onto the brass shaft.
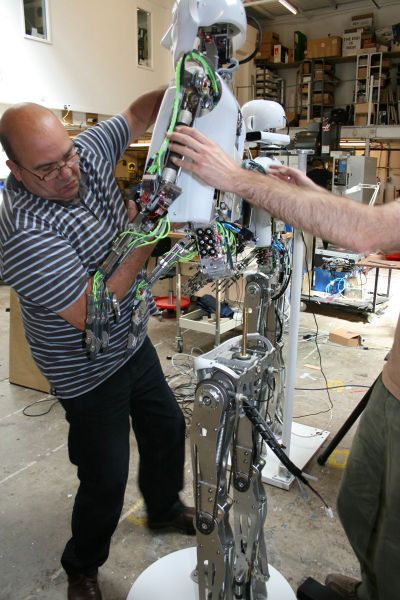
The gear wheel on the motor at the front of the torso should mesh with the gear on the pelvis. If it does not, twist the torso a degree or two to one side to allow the gears to mesh correctly and finish lowering the torso.
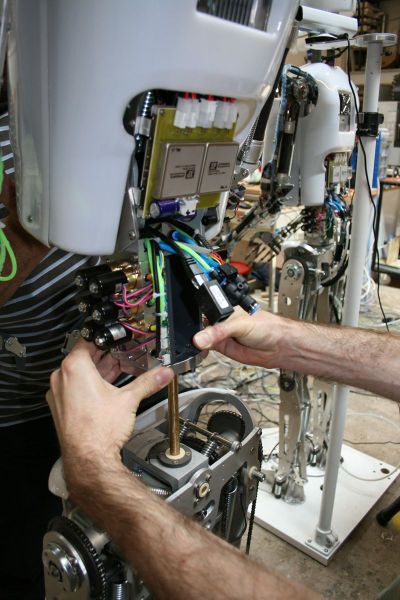
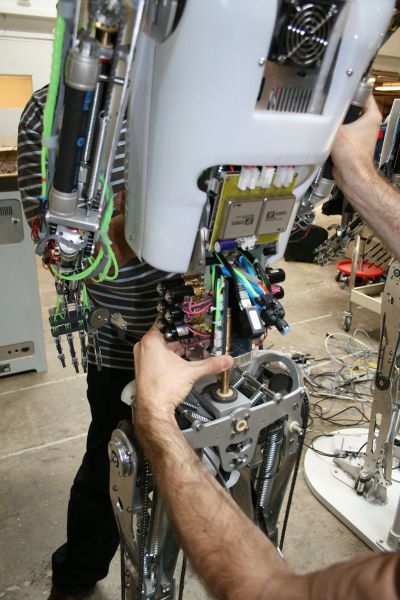
8) Secure torso
Secure the torso in place with the supplied screw
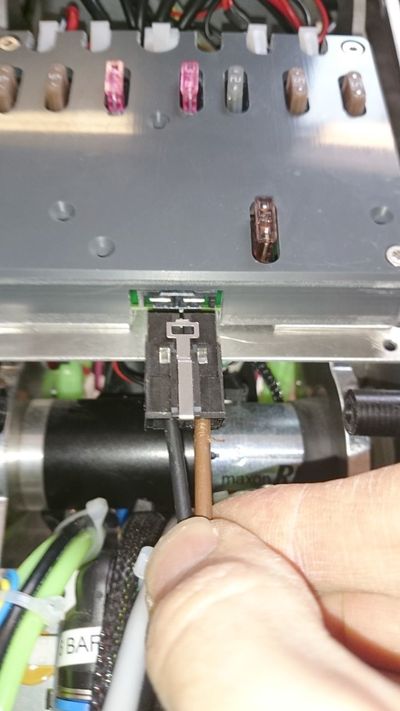
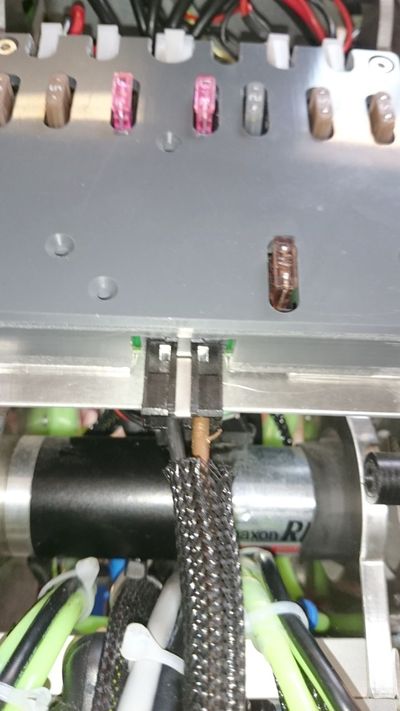
9) Connect cables from legs to torso
Firmly insert the air line from the robot's leg into the blue push-in-fitting on the torso.

Connect the black 6-pin plug and socket (10-pin for RoboThespian with body LEDs). Check the orientation of the plug is correct - the colours on the cables will match.


Connect the network cable from the torso to the network cable from the legs, using the small connector box.

Plug the 24v power cable into the robot's Power Board. Note the orientation of the wires.
9) Connect Touchscreen Kiosk to Robot
- Move the box with the touchscreen kiosk to where you plan to install the kiosk.
- Carefully stand the entire box with kiosk upright.
- Walk the kiosk out of the box.
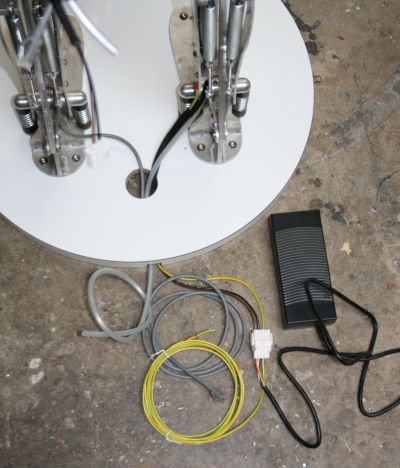
- Locate the cables stored under the kiosk, you should have a bundle of cables - this goes to the robot and supplies the robot with power and network.
- The single network cable should be connected to the internet.
- This will allow you to easily add content and receive remote support from Engineered Arts.
- Please allow RoboThespian to make an outward connection through your router or firewall on port 2022 to Engineered Arts servers.
- The power lead for the kiosk is stored inside, locate this, but resist the urge to plug in just yet!
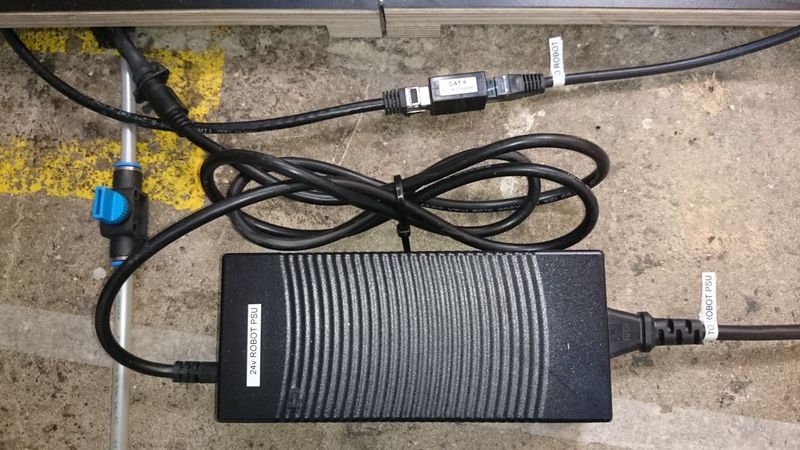
From top of image:
- Join LAN cables (one marked "TO ROBOT") using joiner block
- Airline, please leave air switched off to begin with (see below)
- IEC (kettle cable) marked "TO ROBOT PSU" to power supply marked "24v ROBOT PSU"
10) Setting up supplied compressor
If your RoboThespian is supplied with a compressor please consult the included instructions supplied by the compressor manufacturer and see Compressor Unpacking and Assembly
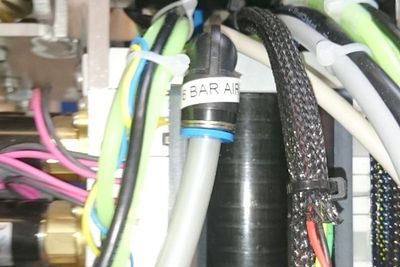
11) Connecting RoboThespian to air supply
See #Minimum_Installation_Requirements for compressed air requirements.
RoboThespians are supplied with a blue Festo Push-In-Fit shut-off valve near the base of the robot - rotate the blue knob until it is at 90degrees to the tubing to shut off the air supply and push in the airline
When ready to operate the robot rotate the shut off valve to the on position (blue knob parallel to the tubing)
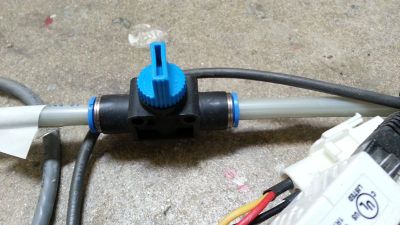
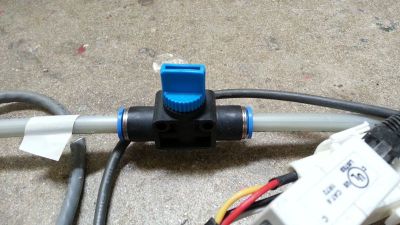
Note there is a small arrow on the shut-off valve, which indicates the direction of flow. If the valve is removed and replaced, make sure it is mounted with the arrow in the direction of air flow (i.e. pointing from the compressor to the robot)
If there are any loud leaks of air, switch the air off again and check the airline into the robot's torso is securely fitted.
You are now ready to plug the kiosk into the mains power. RoboThespian will start up as soon as he has power!
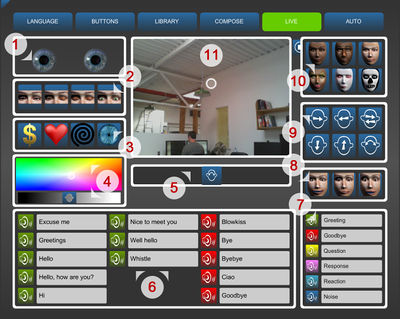
4) Control your RoboThespian from the touchscreen kiosk
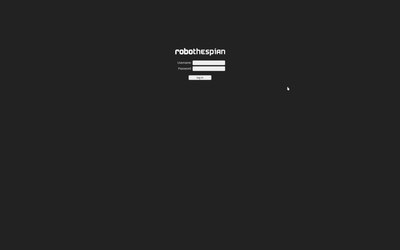
5) Access RoboThespian's Control Panel
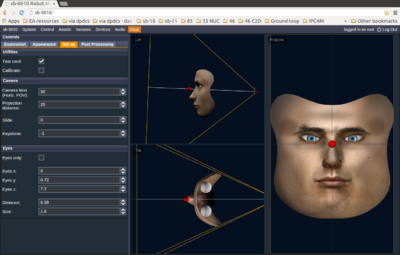
When connected, Robothespian can also be accessed, controlled and settings can be modified via the network.
Please see http://wiki.engineeredarts.co.uk/Tritium_GUI for further details. Some example screenshots:

6) Shutdown procedure
RoboThespian contains a PC and like any PC should be shut down fully before removing mains power.
7) Explore further features
See http://wiki.engineeredarts.co.uk/Main_Page#Features and click on a feature to find out more
For more information and troubleshooting, please explore the links in the wiki, http://wiki.engineeredarts.co.uk/, or contact Engineered Arts if you can not find the information you are looking for in the wiki.