Difference between revisions of "RoboThespian Quickstart"
(→2) Connect RoboThespian) |
(→2) Assemble legs onto base) |
||
| Line 43: | Line 43: | ||
[[File:installation_1.jpg]] [[File:installation_2.jpg]] [[File:installation_3.jpg]] | [[File:installation_1.jpg]] [[File:installation_2.jpg]] [[File:installation_3.jpg]] | ||
| + | |||
| + | <div><ul> | ||
| + | <li style="display: inline-block;">[[File:installation_2.jpg|thumb|none|400px|link=|Tools and fixtures cable tied to top of legs]]</li> | ||
| + | <li style="display: inline-block;">[[File:installation_1.jpg|thumb|none|400px|link=|Screw legs to base]]</li> | ||
| + | <li style="display: inline-block;">[[File:installation_3.jpg|thumb|none|400px|link=|Make sure the legs are locked at the knees]]</li> | ||
| + | </ul></div> | ||
==3) Power on== | ==3) Power on== | ||
Revision as of 12:41, 15 March 2016
Quick Start Guide
Download this page as printable .pdf
Introduction
This is a very brief guide to rapid out of the box installation and operation of Socibot Mini .
Minimum Installation Requirements
RoboThespian Installation Overview & Requirements
Do's and Don'ts
![]() Do follow the instructions in this wiki
Do follow the instructions in this wiki
![]() Do maintain your RoboThespian to ensure it operates safely
Do maintain your RoboThespian to ensure it operates safely
![]() Do switch off your RoboThespian if it is damaged or malfunctioning
Do switch off your RoboThespian if it is damaged or malfunctioning
![]() Do treat your RoboThespian with care and respect
Do treat your RoboThespian with care and respect
![]() Don't allow visitors to touch RoboThespian
Don't allow visitors to touch RoboThespian
![]() Don't disconnect any air or electrical connections while RoboThespian is switched on or has the compressed air supply connected
Don't disconnect any air or electrical connections while RoboThespian is switched on or has the compressed air supply connected
![]() Don't use solvent cleaners or abrasive pads on RoboThespian
Don't use solvent cleaners or abrasive pads on RoboThespian
![]() Don't make modifications or alterations to any settings without consulting the manufacturer first
Don't make modifications or alterations to any settings without consulting the manufacturer first
![]() Don't remove any covers to electrical components unless instructed to do so
Don't remove any covers to electrical components unless instructed to do so
![]() Don't hotplug any cables. Shut down robot and disconnect mains power before plugging / unplugging any cable
Don't hotplug any cables. Shut down robot and disconnect mains power before plugging / unplugging any cable
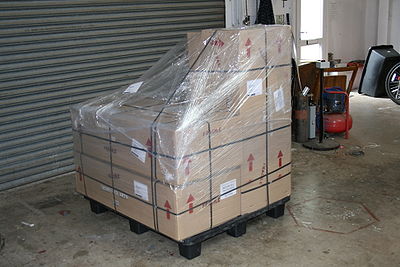
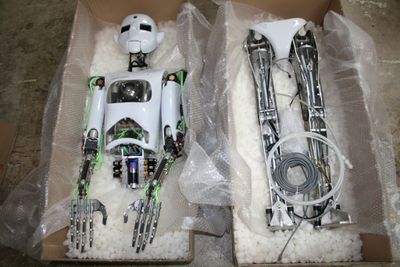
1) Remove boxes or (optional) flight case from pallet
- Open all boxes to identify contents, but do not unpack them yet.
- Please read all the instructions before starting.
- Note the arrows on the boxes, indicating which way up they should be for storage, and opening.
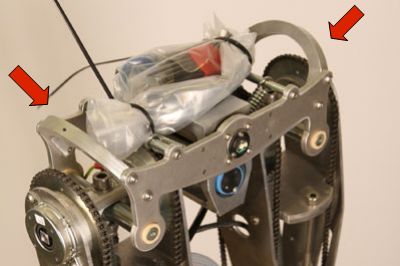
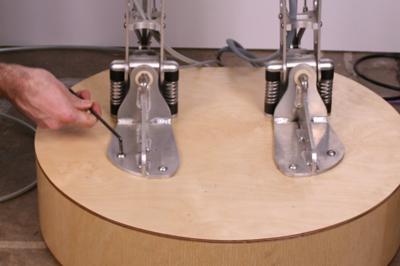
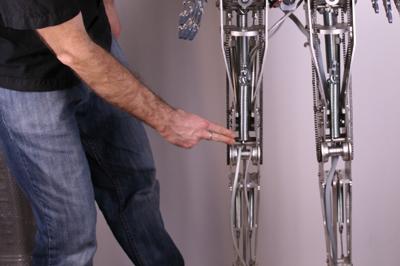
2) Assemble legs onto base
- Remove the wooden base and place in position.
- Remove the legs from their crate / box. Carry the legs in a vertical position, gripping them on the sides, near the top of the upper legs.
- Do not carry the legs using the hips as handles - there is a risk of pinching your fingers
- Screw the legs to the base using the supplied M8 button head screws. One person should support the top of the legs to prevent falling.
- Tools and fixture are cable tied to the top of the legs
- Make sure the legs are locked at the knees - push the knee back until the knee locks into position.


3) Power on
4) Control your RoboThespian from the touchscreen kiosk
5) Access RoboThespian's Control Panel
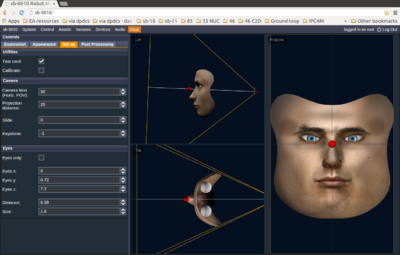
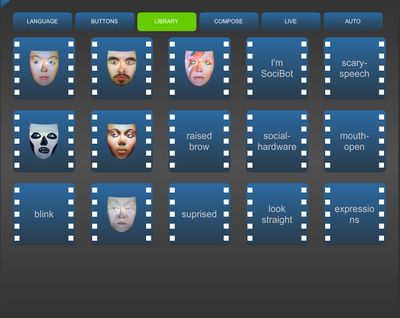
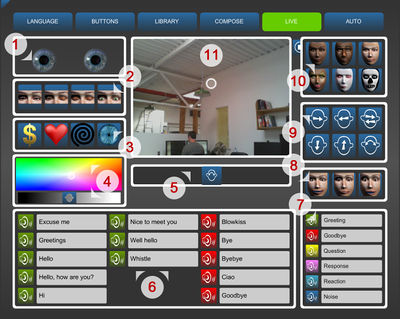
When connected, Robothespian can also be accessed, controlled and settings can be modified via the network.
Please see http://wiki.engineeredarts.co.uk/Tritium_GUI for further details. Some example screenshots:
6) Shutdown procedure
RoboThespian contains a PC and like any PC should be shut down fully before removing mains power.
7) Explore further features
See http://wiki.engineeredarts.co.uk/Main_Page#Features and click on a feature to find out more
For more information and troubleshooting, please explore the links in the wiki, http://wiki.engineeredarts.co.uk/, or contact Engineered Arts if you can not find the information you are looking for in the wiki.
This is a protected page.